Centos7环境使用Nginx自建单向认证
1、应用安装准备
下载nginx安装包nginx-1.17.7.tar.gz
使用以下命令安装依赖
yum install -y gcc gcc-c++ pcre pcre-devel zlib zlib-devel openssl openssl-devel
2、安装nginx
(1)、解压
tar -zxvf nginx-1.17.7.tar.gz
cd nginx-1.17.7
(2)、创建临时目录
mkdir /var/temp/nginx -p
(3)、配置
./configure --prefix=/usr/local/nginx \
--pid-path=/var/run/nginx/nginx.pid \
--lock-path=/var/lock/nginx.lock \
--error-log-path=/var/log/nginx/error.log \
--http-log-path=/var/log/nginx/access.log \
--with-http_gzip_static_module \
--with-http_stub_status_module \
--with-http_ssl_module \
--http-client-body-temp-path=/var/temp/nginx/client \
--http-proxy-temp-path=/var/temp/nginx/proxy \
--http-fastcgi-temp-path=/var/temp/nginx/fastcgi \
--http-uwsgi-temp-path=/var/temp/nginx/uwsgi \
--http-scgi-temp-path=/var/temp/nginx/scgi
(4)、编译
make
(5)、安装
make install

安装完成后启动nginx即可看到
cd /usr/local/nginx/sbin/
./nginx
3、生成ssl v3证书
第一步
[root@localhost ssl]# openssl genrsa -des3  -out temp.key 2048
Generating RSA private key, 2048 bit long modulus
.........+++
...............................+++
e is 65537 (0x10001)
Enter pass phrase for temp.key:
Verifying - Enter pass phrase for temp.key:
[root@localhost ssl]#
pass可自定义123456
第二步
[root@localhost ssl]# openssl genrsa -des3  -out temp.key 2048
Generating RSA private key, 2048 bit long modulus
.........+++
...............................+++
e is 65537 (0x10001)
Enter pass phrase for temp.key:
Verifying - Enter pass phrase for temp.key:
[root@localhost ssl]# openssl rsa -in temp.key  -out mixfate.key
Enter pass phrase for temp.key:
writing RSA key
[root@localhost ssl]#
第三步
[root@localhost ssl]# openssl req -new -key mixfate.key  -out mixfate.csr
You are about to be asked to enter information that will be incorporated
into your certificate request.
What you are about to enter is what is called a Distinguished Name or a DN.
There are quite a few fields but you can leave some blank
For some fields there will be a default value,
If you enter '.', the field will be left blank.
-----
Country Name (2 letter code) [XX]:CN
State or Province Name (full name) []:BJ
Locality Name (eg, city) [Default City]:BJ
Organization Name (eg, company) [Default Company Ltd]:mixfate
Organizational Unit Name (eg, section) []:mixfate
Common Name (eg, your name or your server's hostname) []:www.mixfate.com
Email Address []:help@mixfate.com

Please enter the following 'extra' attributes
to be sent with your certificate request
A challenge password []:
An optional company name []:
[root@localhost ssl]#
第四步
编辑一个v3.ext文件放到当前目录
v3.ext文件内容如下
authorityKeyIdentifier=keyid,issuer
basicConstraints=CA:FALSE
keyUsage = digitalSignature, nonRepudiation, keyEncipherment, dataEncipherment
subjectAltName = @alt_names

[alt_names]
DNS.1 = *.mixfate.com
继续执行以下命令
[root@localhost ssl]# openssl x509 -req -days 365 -extfile v3.ext -in mixfate.csr  -signkey mixfate.key  -out mixfate.crt
Signature ok
subject=/C=CN/ST=BJ/L=BJ/O=mixfate/OU=mixfate/CN=www.mixfate.com/emailAddress=help@mixfate.com
Getting Private key
[root@localhost ssl]#
[root@localhost ssl]# cp mixfate.crt  /usr/local/nginx/conf/
[root@localhost ssl]# cp mixfate.key  /usr/local/nginx/conf/
[root@localhost ssl]#
5、nginx配置文件中修改如下
    server {
        listen       443 ssl;
        server_name  www.mixfate.com;
        ssl_certificate mixfate.crt;
        ssl_certificate_key mixfate.key;
        ssl_protocols TLSv1 TLSv1.1 TLSv1.2;
		...其余配置省略
	}
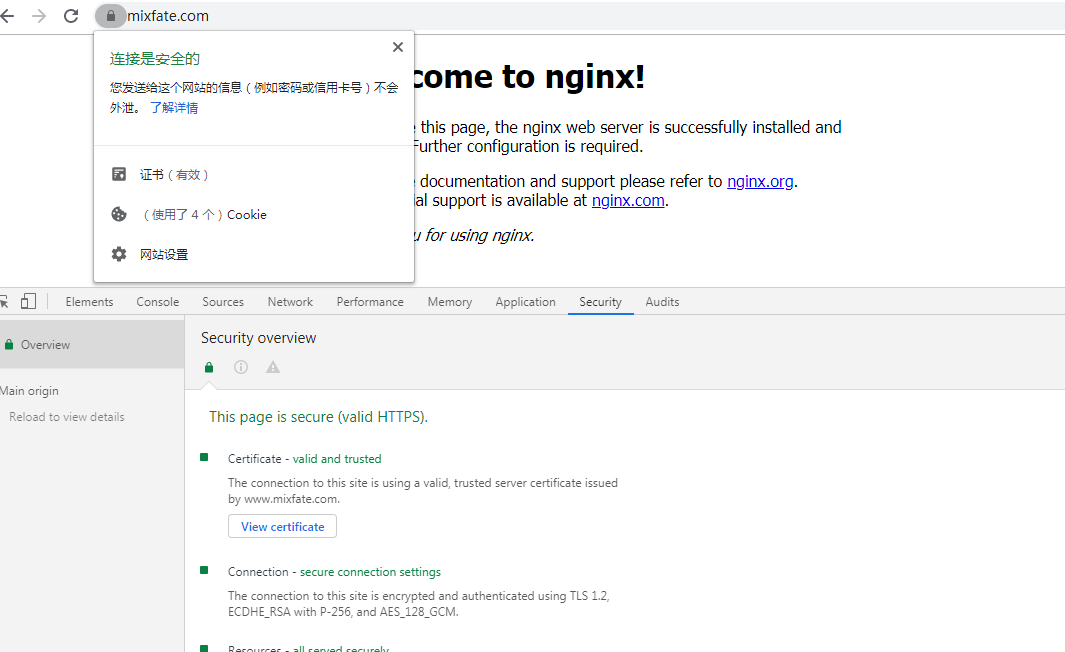
配置好后重启nginx,将mixfate.crt证书安装到浏览器客户端“受信任的根证书颁发机构”中,并在客户端配置host指向nginx即可。
赞赏(Donation)
微信(Wechat Pay)